Custom Search
Showing posts with label Tips. Show all posts

PHOTO TIPS | CITIES : How to shoot Sacred Places?


1. The most important thing is to be respectful & remember what you are photographing. These places are primarily for religion, not for tourists. So, make sure you ask permission first.

2. Sacred places often have large spires or domes on top of a thin building, so it can be hard to fit everything in the frame. If you want to capture the entire building, a wide angle lens may help. Otherwise, you can try a panaromic from several photos.

3. Try to photograph at a time when the sun is to the side of the building, rather than behind it. If the sun is behind you instead, this can also be OK as long as there aren't any large shadows cast on the building.

4. Look for distracting elements in your frame & try to exclude them. Examples include signs, parked cars & rubbish bins.
5. You might also look for distracting elements which would be good to include in your frame. These might include a gravestone, a welcome sign, prayer mats & so on.

6. If photographing inside the sacred place, the light is likely to be poor. If you have a tripod & you've asked permission, make sure you use it!

7. Usually the best settings for poorly lit interiors without a tripod are to increase the ISO level to 200 or 400 & set the aperture to be f/8 or f/11. If the shutter speed is still too slow you may need to use a smaller f-number or increase the ISO level further.

8. Unless you are the only person inside, don't use you flash.

9. Some sacred places will have people selling things outside. These can be a good photography subject, but make sure you buy something small of give them a donation before taking their photo.

TYPICAL SETTINGS
  • Mode - Aperture Mode (Av)
  • Aperture - Middle Range f-Number f/11
  • ISO Level - 100-200
  • Equipement - Tripod preferred

PHOTO TIPS | OUTDOORS : How to shoot Flowers?


1. If you're taking photos of flowers during a sunny day, try to do this or late in the day. Flowers look good to the eye during the middle of the day, but look better to the camera at other times.

2. Shooting flowers on cloudy days can work well, as harsh bright sun can wash out their color & lessen the impact.

3. Shooting early in the morning is the best time if you have the choice, as the winds be at a minimum. There may also be some early morning dew around.

4. A flower is usually most beautiful just after rain, but it can be difficult to get these shots & still keep your camera dry. Try spraying some water on your flower with a spray bottle rather than waiting for the rain to come.
5. Even a slight breeze can cause flower to move & blur, so for the sharpest photos use a tripod & keep the shutter speeds to 1/250 of a second or faster. Shooting early in the morning will also minimise the wind.

6. As you probably using a tripod, there is not much reason to use High ISO levels. Set your ISO at 100 to get the clearest image.

7. If you can't find some nice flower to shoot, try a flower shop, playground garden or flower arcade! To really bring out their color, take then home and try shooting against a solid black or white background.

8. Try getting down low & taking photos of flowers from a different perspective. People see flowers from top-down every day, but rarely see them from side-on or even looking up.

9. Try taking a photo of a single flower & using a large aperture (a small number like f/5.6), so that the background is blurred. This will keep the focus of the photo on the flower & remove the distracting background.

10. You don't always need to get the whole flower in focus. Some images can look great if the back of the flower is out of focus. To try this, you'll need to use your widest aperture (smallest f-number) & focus on the front of the flower.

11. Don't forget that there are many sides to a flower. Try moving yourself around & looking at it from a different side or if you're shooting flowers in a vase, spin the vase around to find the best side.

TYPICAL SETTING :
  • Picture Mode - Aperture priority (Av)
  • f-Number - Small Medium f/5.6
  • ISO Level - 100
  • Equipment - Tripod & Polarizing Filter.

PHOTO TIPS | OUTDOORS : How to shoot Plants?


1. Try to pick the best time of day for your photos. Theres no point taking photos of plants that are obscured by shade or have their colors washed out from bright sunlight. Early mornings will usually be the best.

2. If you're shooting in the middle of the day, a polarizing lens can help to cut down on the harsh light entering the camera & bring out the colors of the plants.

3. Use a tripod if you can, as plants are usually quite fragile & sensitive to even the slightest of movements.

4. If you're using a tripod, set your ISO level at 100 to get the clearest images.
5. Try using a large aperture (low-f-number) to blur the background & keep the focus on the plant.

6. Get down low & take photos of the plants from an angle that they wouldn't normally be seen.

7. Watch out for distractions in your photo, such as a hose or supports. Try to fill the frame with your plants so that they are the real focus of the image.

TYPICAL SETTING :
  • Picture Mode - Aperture priority (Av)
  • f-Number - Small Medium f/5.6
  • ISO Level - 100
  • Equipment - Tripod & Polarizing Filter.

PHOTO TIPS | OUTDOORS : How to shoot Fireworks?


1. A tripod is pretty much essential for shooting fireworks. If you're without one, try to learn against something sturdy like a fence railing or a wall.

2. Be sure to arrive early to pick out a good spot & set up your gear. Generally people will steer clear & give you room if you've set up early.

3. Try not to set up with the wind blowing towards you, because it can blow smoke in front of your shots.

4. Don't set up near bright lights (streetlights), as they will ruin your photos.
5. If you have one, use a remote to trigger the shutter. Even if you are using a tripod, releasing the shutter. Even if you're using a tripod, releasing the shutter yourself can cause vibrations will which cause your shots to be out of focus. A remote will also make it easier to see what is happening around you.

5. The most important part or shooting fireworks is the shutter speed. You'll need to keep the shutter open for a minimum of 1-2 seconds & possibly up to 30mins depending on what you want to achieve. Try experimenting to see what works best.

6. If you want more control over the shutter, switch to bulb mode. Then, release the shutter just before the burst & turn it off when the burst begins to fade.

7. If you want to capture lots of burst, you can switch your camera to bulb mode so the shutter stays open as long as you choose. Then, between each burst cover the lens with a black cloth to prevent too much light getting in.

8. Set the aperture to f/8 or f/11 to get the clearest photos.

9. If you are capturing a single burst, portrait mode will work best. If you are including multiple burst in your shot, landscape will likely work better.

10. Zoom-in so that the fireworks fill the frame. This will make your photo look closer to the action & thus more impressive.

11. Look around to see what else you can include in your shots. Things like buildings, bridges or water can add interest to your photo. Using a wide angle lens cap/dark card-board help to get everything in the shot.

TYPICAL SETTING :
  • Picture Mode - Shutter priority (Tv)
  • Shutter Speed - 5sec - up to 30sec
  • ISO Level - 100
  • Equipment - Tripod, Dark Cardboard.

PHOTO TIPS | CITIES : How to shoot Transportation?


1. The most commonly photographed types of transportation are cars. Some other options for you include buses, trains, motorbikes, scooters, planes & helicopters.

2. You may need to seek out permission before taking photos. If the owner is nearby be sure to ask permission & make sure you check with local authorities before photographing any public transport.

3. Look out for distracting objects in the background. If you have time, move around a bit until the background is plain & simple.

4. If you don't have time to move around, try using a small depth of field (low f-number) to blur the background.
5. Even if you're taking a photo of a parked vehicle, it pays to be quick. Take a few quick photos first, then your time with the rest. That way if the vehicle suddenly moves off, you'll at least have a few photos.

6. If the option is available to you, try wetting the concrete/tar around your vehicle. It can help to increase contrast & sometimes provide reflection.

7. Try to leave some space in front of the vehicle. If the front of the vehicle is too close to the edge of the frame, it has nowhere to go and looks squashed.

8. Sometimes zooming in on the details rather than capturing everything can make a better photo. Typical things to zoom into include logos, wheels, engines or other shiny parts.

9. If you have problems with reflections from the vehicles paint, a polarizer lens may help.

10. When taking a photo of something large, like a big train, it may help to have one or two people in the photo to show how large it is.

TYPICAL SETTINGS ;
  • Mode : Aperture Priority (Av)
  • f-Number : f/3.5 - 5.6
  • ISO Level : 100
  • Tripod preferred

PHOTO TIPS | CITIES : How to shoot Zoo's?


1. Look out for signs that show when the feeding of performance times are & make sure you are able to attend these. Get there early to find a good position. If you are also able to setup a tripod, then people will usually give you some room.

2. It can be worth doing some research on different exhibits before you get the to the zoo, so you know what you really want to see first and before the crowd arrive.

3. Most zoo don't allow tripods, so if you are planning on bringing one be sure to check with management beforehand. If you can't bring one try learning against a wall or a fence.

4. Early morning photos can often turn out the best, when the lighting is not as harsh as during the middle of the day. You might also find that the animals are most active then.
5. If taking a photo of a single animal, focus on the eyes. As long as the eyes are in focus other parts out of focus won't matter.

6. Try not to include bars in your photo. If you have no choice, press your camera up against the cage, select a wide aperture (low-f-number), zoom in & focus on the animal. This should eliminate the bars.

7. The background will often be a problem with your images, so pay close attention to it - you don't want cages or bars if possible. You can try zooming right in on your animal, blurring the background by selecting a wide aperture (low f-number) or simple moving to a different angle.

8. Often you may be shooting through glass, which can cause problems with reflections. Try to move around until the reflection is gone. A polarizing filter can also help to cut down the amount of reflection. Don't forget to wipe off any finger prints or smudges on the glass as well.

9. A photo of an animal you don't often see can be interesting, but if you pay attention to the composition you can create a really great photo. Look for points of interest or natural type surroundings around the animal to see what else you can include in your shot.

10. Look out for sign that show when the feeding or performance time are & make sure you are able to attend these. Get there early to find a good position. If you're also able to setup a tripod, then people will usually give you some room.

11. Remember that other guests at the zoo have paid the same money that you have to be there. Just having a camera does not give you special privileges.


TYPICAL SETTINGS ;
  • Mode : Aperture Priority (Av)
  • f-Number : f/5.6
  • ISO Level : 100
  • Polarizing filter beneficial


Use the configurator as a tool to help select the correct tripod or head for your camera!

PHOTO TIPS | CITIES : How to shoot street performers?


1. If you get the chance, talk to the performer before he begins so you can learn a little about what is going to happen during the performance. They will be even more forthcoming if you offer to give them some of your photos as a donation.

2. For high action performances, you may need to increase the ISO to get a photo which is in focus.

3. You will probably need to use a wide aperture (low f-number) to keep the performer in focus. Be aware that this will blur the background & may not be what you are after.

4. Keep the camera UP & READY, as things can move quickly and you don't want to miss the shot.
5. Try to anticipate what is coming next in the performance . Often the performers will be working up to a big finale at the end.

6. Including some of the crowd in your photo can make a great image as they look on in amazement. Little children are especially good for this.

7. If the performance is at night time, you may need to be patient & wait for performers to come into good lighting.

8. Don't forget to donate some money, as these performers are usually trying trying to earn a living.

9. If the street performer is moving around a lot, it might be worth shooting in continuous mode.

10. Be courteous of the people around you & remember the performance isn't just for you.


TYPICAL SETTINGS ;
  • Mode : Aperture Priority (Av)
  • f-Number : f/3.5 or 5.6
  • ISO Level : 200
  • Tripod preferred

PHOTO TIPS | CITIES : How to shoot Market Photography?


1. Try talking to people before taking their photo. If you show your friendly side & ask them a few questions about themselves or their products, they will be much happier to give you the photo you are after.

2. Be sure no to interrupt market vendors & distract them from their job. Letting them carry-out their normal duties will usually create the best shots.

3. Market are generally very busy, so rather than trying to capture it all at once & ending up with a cluttered image, focus on one person or one market stall.

4. Many people love to see photos of themselves, so give the subjects a look on your LCD Screen once their photo has been taken.
5. Covered stalls can result in problems with lighting, so either take photos of something else, or wait for stall owners to come into the light, which usually happens they are handling a purchase to a customer.

6. Look for patterns. Often times vendors put their products in patterns of different shapes & colors offering interesting shots that illustrate that culture.


TYPICAL SETTINGS ;
  • Mode : Aperture Priority (Av)
  • f-Number : f/11
  • ISO Level : 200
  • Tripod preferred


Use the configurator as a tool to help select the correct tripod or head for your camera!

PHOTO TIPS | PEOPLE : How to shoot indoor portrait (Planned)?


1. Potrait photography is all about capturing the person for who they truly are. Planned portraits can make this difficult as the person is expecting you to take photos and won't truly be themselves. Try taking some photos of them when they least expect it.

2. Try to think beforehand what type of photos you want to take. Close-up, full body, upper body, looking at the camera, looking away - there are a lot of options. Consider what might suit your subject best, but don't be afraid to try a few different things.

3. Setup your lighting so that it is coming from the side and slightly above. Never have the lighting glaring straight at the person as the photo will be unflattering. For that reason, avoid using the inbuilt flash.

4. Close-up photos should include the subject's shoulders and head, or even a little less. Ensure the face fills the frame but be careful not to cut off any part of the head.
5. Upper body shots can be easier than close-ups, as they allow you to include some background and give your subject some room. If you're not having much luck with a close-up, try an upper body shot instead.

6. If you can set your lens at around 90mm zoom & move your camera to where you need it to be. This will provide the most even & realistic photo, whilst keeping the person looking good. Generally, your camera should be about 8-10 feet back.

7. You may like to try using a set background like many photography studios do. You can try a roll of plain paper, such as cream or off-white. A black background will create some drama & can have stunning results, but don't use it all the time.

8. Your aperture should be set at f/8 or f/11 for the clearest, sharpest image.

9. Your focus point should be on the eyes, which will usually be put in the middle of the frame and one third from the top.

10. Make sure the camera is placed at eye level, don't look down or up at the subject unless you have a good reason.


TYPICAL SETTINGS ;
  • Mode : Aperture Priority (Av)
  • f-Number : f/11
  • ISO Level : 100
  • Tripod preferred
  • Flashgun, Difuser


Use the configurator as a tool to help select the correct tripod or head for your camera!

PHOTO TIPS | PEOPLE : How to shoot weddings?


1. You should discuss with the couple beforehand what sort of photos they are after. It would be a good idea to bring along some examples (even if they are not yours) to use as inspiration. Discuss things like location, colour vs black & white, style & who will be in what in photos.

2. Make sure you've plenty of memory available. There aren't many situations where running out of memory will be as bad at a wedding.

3. It's important for you to check the location of the wedding well in advance, as you don't want to be late. If you don't know the area, drive out to it a day before to find your way & also to get an idea for some possible photos.

4. Try to get to the bride's house as early as you can, as it will likely get chaotic towards the departure time.
5. At some point you will take photos of just the bride on her own. When this happens, try to capture her standing in soft, diffused light such as that coming from a window receiving indirect light.

6. Remember that a wedding is the sum of it's parts. Try photographing things like shoes, bouquets, the wedding dress on it's own, the groom's tie, the empty altar (anything that looks interesting).


7. When inside the hall, you don't want to intrude on the ceremony. Try your best to be invisible and silent & turn off any sounds your camera makes.

8. It will likely be dark inside the hall, so you will probably need to increase your ISO level. Take some test shots beforehand to see what ISO level you need to get a quick shutter speed, which may be as high as 800.

9. After the ceremony, try to take just a few shots of the couple on their own as soon as possible. They will soon be surrounded in family & friends & by the time you get them alone again they will probably be feeling worn out & less photogenic.

10. When taking photos of larger groups of people, use an Aperture of f/11 & focus on the eyes of the people at the front.

11. Have the couple nominate someone who can round up family members for different photos, rather than waiting for people to appear.

12. It's a nice idea to bring along a few snacks with you. You can bet the bride & groom probably haven't eaten much all day & will feel much happier with some food & drinks to relax them.

13. Keep the backgrounds in mind with your photos. Guests will probably be moving around so if you need to open up the lens (decrease the f-number) to blur the background.

14. You might want to have you camera on Continuous Shooting Mode. After all, you did bring plenty of memory right?


TYPICAL SETTINGS ;
  • Mode : Aperture Priority (Av)
  • f-Number : f/11
  • ISO Level : 200/400
  • Tripod preferred
  • Flashgun, Difuser


PHOTO TIPS | PEOPLE : How to shoot nude portrait?


1. Unless the person you are photographing is very-very ;) confident, they're unlikely to feel completely comfortable. Do your best to make them feel at ease by ensuring their privacy (eg. all windows covered) keep the room warm and praising them often.
---------------------------------------------------------------

2. It;s a good idea to ask your model to wear loose clothing before the shoot, as tight clothing can leave marks on the skin which take some time to go down.
---------------------------------------------------------------

3. Spend some time before the shoot looking at different examples of nude portraits. Find some that you like and then show them to your model when you are ready to start shooting. This will give them some confidence in knowing what to do & feeling more in control.
---------------------------------------------------------------

4. You will most likely be shooting inside, so take the opportunity to use a solid background. Black canvas works particularly well with light skin. Conversely, if your subject has dark skin a lighter background will work well.
-------------------------------------------------------------------------------------------------------------------------

5. Black & White images are quite popular in nude photography, as they help to hide spots and blemishes. If you're shooting in black & white, pay attention to the lighting & review your shots regularly.
-------------------------------------------------------------------------------------------------------------------------

6. You will most likely want to set your zoom at around 90mm & place the camera about 8-10 feet back. Not only does this give good results, but also leaves a bit of space between you & the model, which helps to avoid any awkward moments.
-------------------------------------------------------------------------------------------------------------------------

7. Lighting should be soft for this type of photography. Use studio lights if you have them, but otherwise be sure all lighting sources are giving out soft light. Covering lights with a thin sheet can give you the look you are after.
-------------------------------------------------------------------------------------------------------------------------

8. Often the best nude images don't contain the SUBJECT'S FACE, or have the face turned away from the lens. This helps to keep the focus on the body or curve rather than the face, as well as create some mystery, which is essential in nude photography.
-------------------------------------------------------------------------------------------------------------------------

9. Keep some blankets or even a robe handy, so that you model can cover up when you are doing something other than taking photos.
-------------------------------------------------------------------------------------------------------------------------

10. Taking a nude portrait doesn't mean your subject can't cover up at all. Often a sheet or hands placed appropriately can create a much more powerful image.
-------------------------------------------------------------------------------------------------------------------------

11. If you have the chance, invite your model back for a second shoot. You will most likely have more success the second time around, once you both know what to expect.
-------------------------------------------------------------------------------------------------------------------------


TYPICAL SETTINGS ;
  • Mode : Aperture Priority (Av)
  • f-Number : f/11
  • ISO Level : 200
  • Tripod preferred
  • Studio light, Natural light / Flashgun


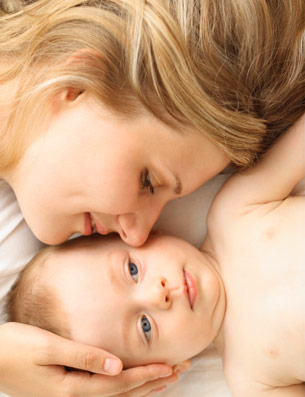
PHOTO TIPS | PEOPLE : How to shoot babies?


1. Babies are often surrounded by clutter. Try to set up your scene a little bit before shooting by removing most of the toys. If you wish, leave one or two in the picture but be sure they are not too colourful.
-------------------------------------------------------

2. Babies are generally known to be soft and gental, so your lighting should reflect this. Soft, diffused light is the best. You can try shooting outdoors in cloudy weather, or using a thin bedsheet to block out harsh light.
-------------------------------------------------------

3. Props can work well in baby photography. Try some adult shoes, a large shirt or big sunglasses.
-------------------------------------------------------

4. Surrounding the baby in a fluffy towel or soft fabric is a common theme, which will play on the subject's innocence.
-------------------------------------------------------

5. Older babies can be full of energy. Rather than trying to keep the baby in one spot, take advantage of their energy and choose sports mode on your camera.
It is essential that you get down to the same level as the baby. Shooting from above will look unnatural and unflattering.
-------------------------------------------------------------------------------------------------------------------------

6. If you do want to shoot from above the baby, make sure you wait until they are looking up into the camera.
-------------------------------------------------------------------------------------------------------------------------

7. It's a good idea to set your camera into CONTINUOUS shooting mode. It's give you one chance to capture a smile & snap many photos quickly.
-------------------------------------------------------------------------------------------------------------------------

8. In most photography, capturing eyes is very important. For babies however, best shot can be one of them concentrating on something new.
-------------------------------------------------------------------------------------------------------------------------

9. If you're having trouble getting a good photo, why not try waiting until the baby is asleep? They won't move much then & you will have plenty of time to compose your shot.
-------------------------------------------------------------------------------------------------------------------------

10. Try illustrating the size of the baby. A good way of doing this is shooting the baby's hand holding that of an adult.
-------------------------------------------------------------------------------------------------------------------------


TYPICAL SETTINGS ;
  • Mode : Aperture Priority (Av)
  • f-Number : f/5.6
  • ISO Level : 100


Custom Search
Related Posts Plugin for WordPress, Blogger...